Tuesday 21 January 2014

Using Large Paper Designs on Cards...

Have you seen papers that you love but think they are not suitable for cards because of large patterns? Think again. Most paper companies these days produce 6x6 or 8x8 pads for card makers, but don't dismiss the 12x12's solely because of larger patterns, instead look at them and think "how can I incorporate this into my design".


The paper I am using here is "Gorgeous" from the Graphic 45 Couture collection. This is a larger card, measuring 8" x 6". Cut a fold 12" x 8" piece of plain cardstock into 8" x 6", then measure a piece of the Gorgeous paper slightly smaller to go onto the front, don't glue it on yet.

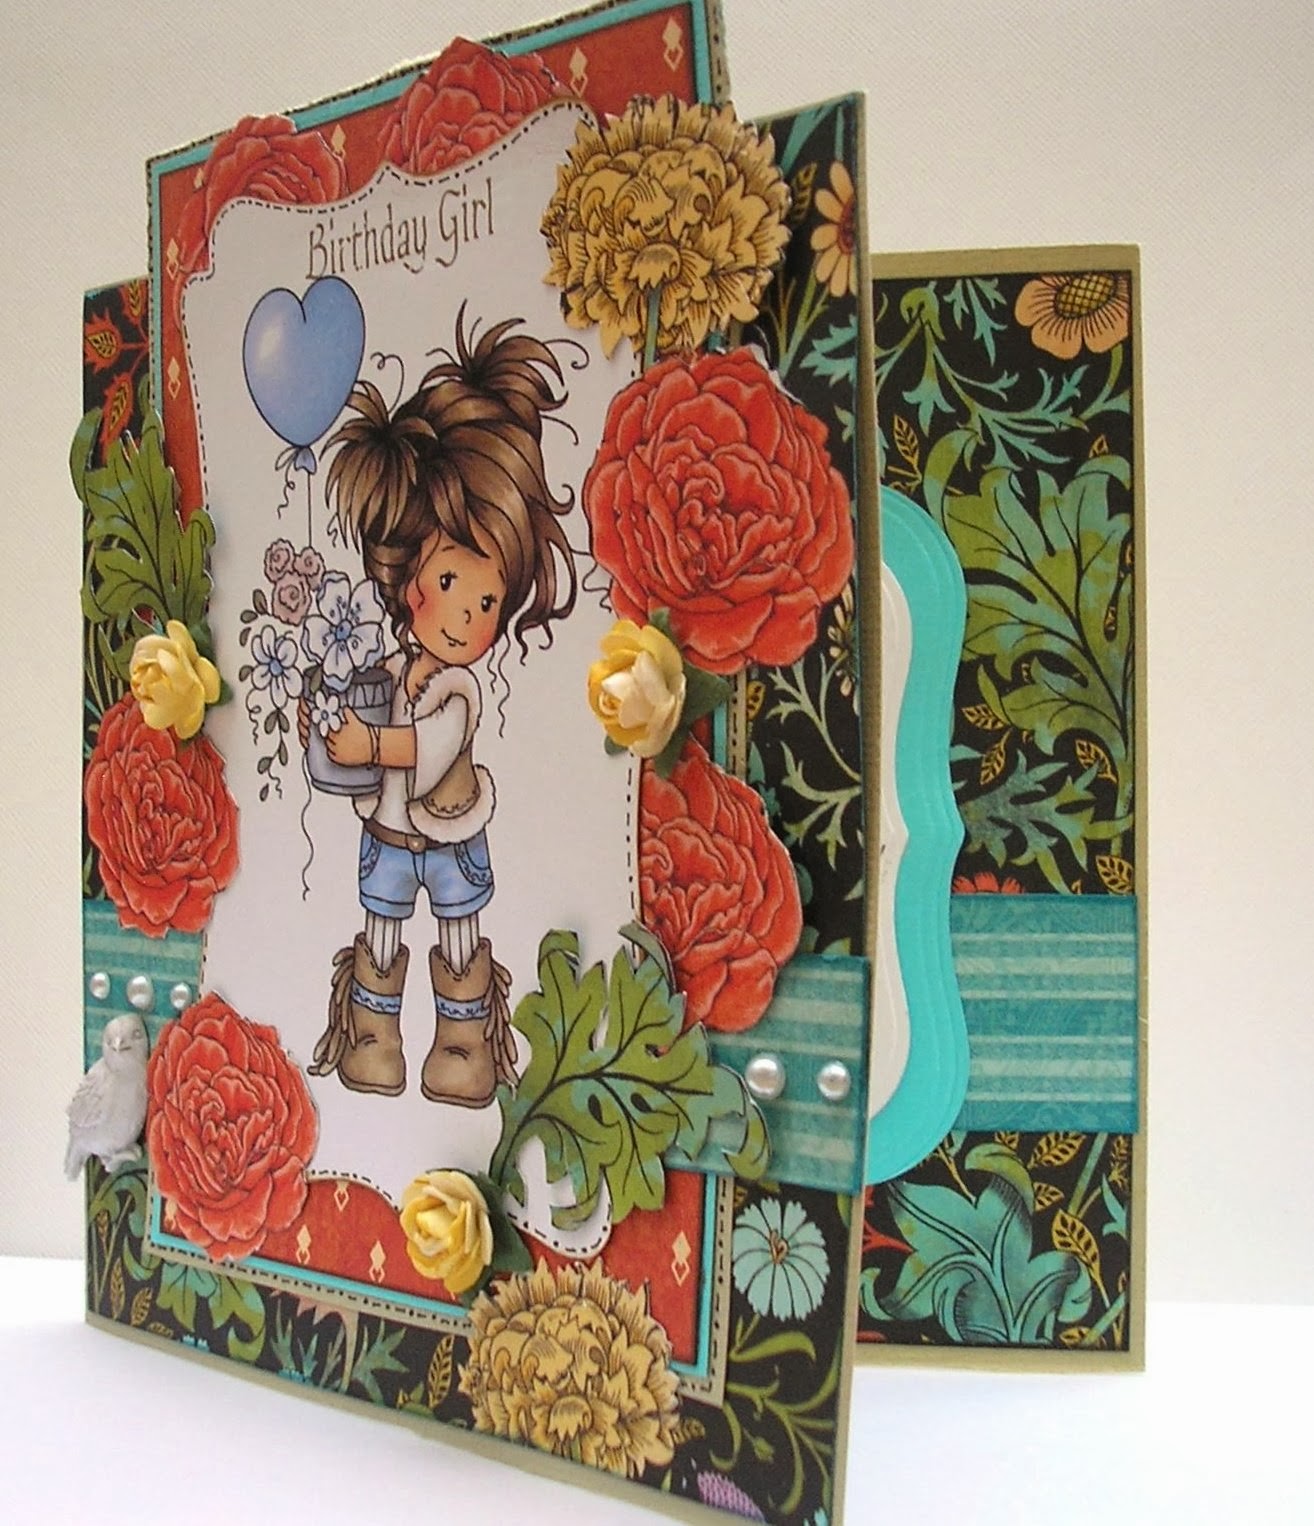
Create a centrepiece. I used a Wee Stamp topper from the "Hopeful" sheet  on another of the Couture papers "Lovely" (I used the largest image).  Arrange where you want the topper piece to go, then using a craft knife cut around the large flower designs that lie around the edges of your centrepiece, cutting only the areas that are below your design, so that the flowers are still part of the background paper, but will lift in part and sit on top of your topper..

Glue your background paper onto the front of your card, taking care not to glue down the cut areas.

Glue the centrepiece on the card, ensuring you lift the flowers to sit on top. I added a little border strip that I cut from a piece of the reverse side of the Gorgeous pape (it is a double-sided paper). I then cut out various pieces from the remaining sheet, including more flowers and some leaves. TIP: If you are going to pop flowers behind something, cut them in half. The top two roses behind the wee stamp topper is one rose cut in half.


I finished the card with a Prima Resin bird, a few roses, and pearls, but it didn't really need much more; that one sheet of 12x12 paper gave me not just backing paper, but also amazing embellishments for my card.


http://www.charmedcardsandcrafts.co.uk/acatalog/shop.html


 The Graphic 45 range often comprises gorgeous larger patterns, I hope I have encouraged you to try using them for your card making :)

Wednesday 8 January 2014

Thank You....

Crikey!! The weather we've been having huh!?! Unbelievable! I have never known anything like it. My heart goes out to all of you who have been adversely affected ♥ Let's hope it settles down soon. The US are seeing some incredibly low temperatures with the deep freeze continuing. Again I hope and pray all our American friends are safe ♥

Today's blog inspiration is a little thank you card, bet we all have a few of those to hand out after Christmas!


I used an older Basic Grey pad here, I think it's Wisteria. The background paper was cut all around the page with a Martha Stewart punch set. I then cut around a flower pattern on another one of the sheets from the pad, and layered that on top. The sweet little girl is a Wee Stamps card topper, this one if from the "Silver Fairy" sheet, I showed you a card using one of the other images on that sheet a few posts ago. I inked around the edges with distress ink and mounted it on coordinating cardstock. The little "Thank you" is a Basic Grey rub-on.

Banner was die-cut, I used the back of an empty embellishment pack as paper, waste not want not :-)   The ribbon and bow are actually purple, I just can't get the right light at the moment. Pearls, crystals and a little rose completes the card.

Faux stitching applied with an Inkssential pen all around the edges, then just a little Stickles to highlight the flowers she is carrying.


 Stay warm, stay safe, and see you soon xx


Saturday 4 January 2014

Happy New Year!

Happy New Year to all our lovely crafting pals xxx We hope you arrived safe and sound into 2014. May this year be full of blessings for you xxx

Have you been following our Facebook Give-aways? We have introduced quick give-aways on our Facebook page and did they daily for a few days. We are now settling into a regular Saturday give-away slot and hope you will join us each week.

A little inspiration for 2014. Again I used one of the card toppers I used before, this one is from the "Hopeful" sheet. This is one of the large images and the resulting card is size 8" x 6". I have made this one shabby chic, with layers of distressed and torn patterned paper. I used Graphic 45's Couture paper ("Lovely" and "Style" as well as Bo Bunny The Avenues paper "Home".


I love the Prima resin and have used two of them here:


 I decided on a simple layout inside the card. The ivy here and the two corners on the front are cut from a Marianne Design Ivy die:


A Tim Holtz Distressing tool was used on all the edges for a distressed look and I tore into some of the paper. Also used: Roses - Large Prima Flower -Pearls - Ribbon - Spellbinders dies - Tim Holtz Adage Ticket - Stickles - Button - Imaginisce Polished Pebble Brad