Showing posts with label Stamperia. Show all posts

Wednesday, 17 June 2020

Stamperia News


https://www.charmedcardsandcrafts.co.uk/acatalog/Stamperia.html

It has been a while since our last post, and a lot has happened in the world since then. I hope you are all managing to stay safe without feeling too stir crazy. It's been a strange old time for us all. A lot of people have been discovering new passions, or rediscovering old ones, such as cooking and of course crafting.  So lets move onto crafting :) Stamperia in particular.  Here at Charmed Cards & Crafts we were one of the first companies to stock the products from Stamperia, and as their product ranges continue to grow, so does our love for them.

The new releases are imminent. As always when Stamperia do a major release they do it big time! They stagger it over a few months, so products will be released periodically.  For this reason we do not offer pre-orders on the new products, but rest assured that we will get plenty of stock in and let you know as soon as we have it.

There seven main collections being released, with each collection comprising 12x12 and 8x8 papers, chipboard (two new types), die-cuts, stamps, stencils, moulds:

June/July releases:

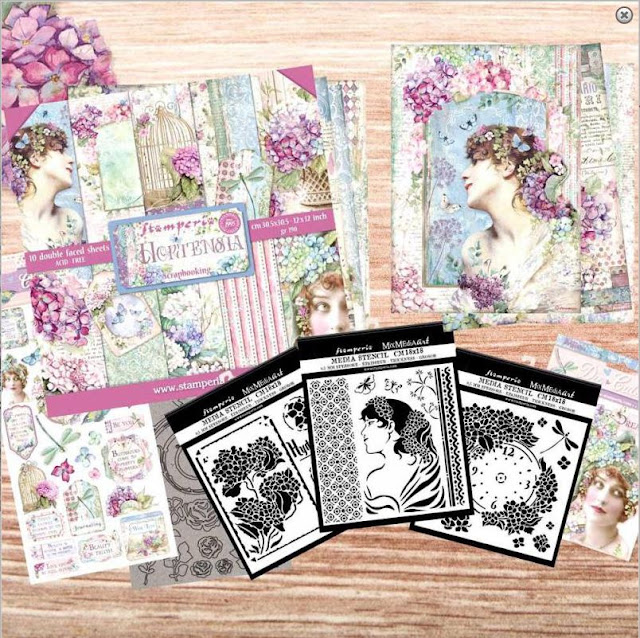
HORTENSIA (you can see some more of  the Hortensia collection in the top banner)

https://www.charmedcardsandcrafts.co.uk/acatalog/Stamperia.html

PRINCESS


https://www.charmedcardsandcrafts.co.uk/acatalog/Stamperia.html


SWEETIE


https://www.charmedcardsandcrafts.co.uk/acatalog/Stamperia.html

LOVE STORY


https://www.charmedcardsandcrafts.co.uk/acatalog/Stamperia.html


ALICE GOLD (larger Alice pack with stunning gold accents)


https://www.charmedcardsandcrafts.co.uk/acatalog/Stamperia.html


JulyAugust releases:


WINTER TALES

https://www.charmedcardsandcrafts.co.uk/acatalog/Stamperia.html

ARCTIC ANTARCTIC


https://www.charmedcardsandcrafts.co.uk/acatalog/Stamperia.html


There are lots more releases from Stamperia, including new mixed media, I will do a post on the new resins etc when we get it in. See video presentations from them here. We will add to this area when we get more:


TUTORIALS & INFORMATION: Stamperia offer lots of tutorials on using their products. Check them out here

They also now offer more eLearning, right here at their E-Academy


FIND ALL STAMPERIA PRODUCTS IN OUR SHOP

Happy Crafting friends :)


Sunday, 12 January 2020

Seaworld ATC's Using New Stamperia

It is always exciting when new paper lines are released, and none more so than from Stamperia.  One of the new paper lines - "Seaworld" - was created by the uber talented Antonis Tzandakis, who also designed Mechanical Fantasy and Azulejos for Stamperia.
 The Charmed Cards & Crafts monthly ATC swap was themed "Seaworld" and OF COURSE I just had to use the brand new papers:


 ATC's are based on a piece of cardstock measuring 2.5" x 3.5". I used a sand coloured piece in this size to emulate the sea floor,  then cut a fishnet from a fishnet die, and wrapped this around the base. 
The tags are from the Stamperia "Seaworld" 12x12 paper pack (we also have the pack in 8x8). I cut these out then glazed them with Stamperia Transparent Crackle Glaze. Once dry the paper had buckled so I adhered the tags onto dark brown cardstock, inked edges then put between heavy books for a couple of hours to ensure they were completely flat and stuck down. 
A large eyelet was inserted at the top of the tag and twine inserted. The tag was then mounted onto the fishnet base on foam tape, but using the wet Stamperia Mixed Media glue to ensure a strong hold. The bubbles and metal octopus were likewise adhere with Mixed Media glue. The chipboard sentiment is a Kaisercraft Flourish from the "Nautical" pack.


 You can see how the crackle glaze gave a 3-dimensional effect:


The papers you see below my ATC's are all from the paper pad - how amazing are they!!!  This pad definitely has the wow factor.


Here is a project created by Antonis Tzanadakis:


You can find the new Seaworld papers HERE. Soon we will have lots of coordinating products to go with them, such as stamps, stencils, rice papers and more.  Subscribe to our newsletter to get them as soon as they arrive.


Monday, 16 December 2019

Stamperia Christmas


Hi All,

Christmas is approaching at a frightening speed; why is it it always takes me by surprise even though I think I have it under control?  If you are behind then I hope you can take inspiration for Christmas cards from these super easy cards.  I used two sheets of 12x12 Stamperia papers that had appropriate designs, these are from the "Make a Wish" collection. I used papers "Christmas Cards SBBL636" for the rectangle images, and "Christmas Rounds SBBL637" for the round images.

Most of the cards are A6 size, with the three largest in A5.

I cut out two mats, one slightly smaller than the card in a beige cardstock, and one slightly smaller  in red. Using the holly design from the Kaisercraft stencil "Holly" I stencilled the design onto the red cardstock using Finnabair "Snowflake Paste" and left to dry. Once dry I inked the red cardstock with metallic gold ink, matted it on the brown cardstock, bound a piece of red velvet ribbon around it, and adhered this piece to the front of the card. 
I cut out all the circles on the paper, inked edges, matted on dark brown cardstock, then brushed some of the rounds with Stamperia Crackle Glaze. Once dry they were mounted onto the front of the card on foam tape. I finished these cards with a sentiment and a little poinsettia. These are the round design cards (you can also find them in the "Make a Wish" pack):

Here you can see the crackle on the "Make a Wish" card.


 I also added a Kaisercraft Flourishes Star from the pack "NORDIC" and added sparkle to the star with Crystal Glamour Dust:


The other cards with the round cut-out images:


Here you can see the lovely crackle effect:


Attach the round circles and sentiment on foam tape to elevate them as shown:


The rectangle cards:


The first card is A5 size:


 The following cards areslightly smaller than A5:


Crackle glaze on baubles:


The paper has a corresponding journalling rectangle on the reverse side, so if you have two of each sheet you can use the second on the inside of the cards:


On the next card I added snow to the roodtops, brads to the tags, a glittery star, a lace strip and a sentiment - sorry my computer increases the brightness each time I try to crop etc, it is infuritating! No idea why it has started doing that. Colours are far more subtle than below:


 So there you have a whole load of cards. These were really fun to make, and to be honest they looked even better in real life :)  Find the Stamperia papers here

Happy crafting friends xXx

Thursday, 15 August 2019

Mixed Media on Cards


 At Charmed Cards & Crafts we stock a huge array of goodies from Stamperia. A recent release is a fabulous collection called "Cosmos". The collection comprises 12x12 papers, rice papers, stencils, chipboard and moulds.   Mixed media projects are fun, I want to show you that you can create fabulous cards using mixed media, and what better collection to create with.  We have run monthly ATC swaps for over a decade now, and our theme this month was a moodboard featuring Cosmos.  My swaps there also feature here. Thus - expect a million picture to follow ...!

CARD 1- "One of a Kind"


The first card I want to show you is quite large, measuring 19.5cm x 14.5cm. I used black cardstock to create the card itself.   One of my favourite dies is a Zipper die (out of stock, sorry). Cutting out the design using Duck Egg Blue cardstock, I distressed and aged it using metallic gold ink. I then notched out the section from the card front where I intended to insert the zip.
I cut a piece of paper from the Cosmos pad, slightly smaller than card front, inked edges with gold ink and attached to front of card. Again I cut out the place for the zip and attached it to the top.

To add dimension I used Finnabairs Gold Icing Paste with Stamperia Cosmos stencil KSTD044. I then added Prima/Finnabair art stones (you can also use Stamperia Art Stones "Lunar Grains"). You can see here how lush that icing paste is, rich and bright gold, love it!


The art stones were put on using mixed media glue and dries clear. On the picture below it was still wet.


 Add a piece of the same Cosmos paper inside the card. Here you can see what it looked like before I added the dimension to the front.


 When the card is closed you can now see the internal paper:


The centrepiece for my card front is one of the images from the Cosmos pad - and loving owls this one blew me away! I inked the edges with gold, then layered it, using 1mm foam tape, on Duck Egg Blue cardstock (inked) and then black cardstock. I used Glossy Accent on the moon, the eyes, and the beak.


When the art stones were dry I coloured them haphazardly using Finnbair/Prima Opal Magic Paint (Coral/Teal), then waxed with Stamperia Cerantica Ancient Gold Wax.


I painted a metal piece I had, using the Opal Magic paint and added it to the bottom of the card, ensuring I left room for my centrepiece.


 I inked a quote chip from Tim Holtz and attached to the top using foam tape.


The centrepiece was attached using 3mm foam tape with a few feather tucked behind it to finish it off:


  The inside was decorated too:


CARD 2-"Chase the Moon ..."


 On the next card I used art stones as a frame, not merely to add dimension.

I wanted this to be really rustic so after covering the front with Cosmos paper (and four corners cut out from the Cosmos paper) I liberally added Stamperia Clear Crackle paste. When dried it hardened and curled the edges, which was exactly what I was after, as well as leaving a lush crackle.  
The centrepiece was mounted as the previous card and added to the centre (this card is 6"x6" size)
Art stones were added, then painted and waxed as previous card - as I wanted this to look really rustic I brought both paint and wax onto the card itself. As before I dabbed some of the  wax here and there for a gold shimmer. Colours were much more subtle than in my picture. Just couldn't get the light.


 Inside was simply decorated to coordinate with the front:


Cosmos Artist Trading Cards

My three ATC cards.  ATC stands for Artist Trading Cards, and are 2.5" x 3.5" pieces of art in a specific theme. These used the Cosmos papers, as well as turquoise leather craft lace, feathers  and metal.  Glossy Accent was used to accent each card also.


I hope I have persuaded you to try mixed media on your cards.