Showing posts with label Christmas Card Ideas. Show all posts

Thursday, 19 December 2019

Creating with the Scrap Boys


Hi Guys,

Can't believe it's almost the big day! I hope you have joined in our daily advent give-away over on Facebook.  I thought I would show you a few Christmas cards I created with one of the new brand Scrap Boys first release "Cotton Winter". We love these papers, we have just had another three new collections, making it six collections now available (see them all here).

My first card is size A5. 
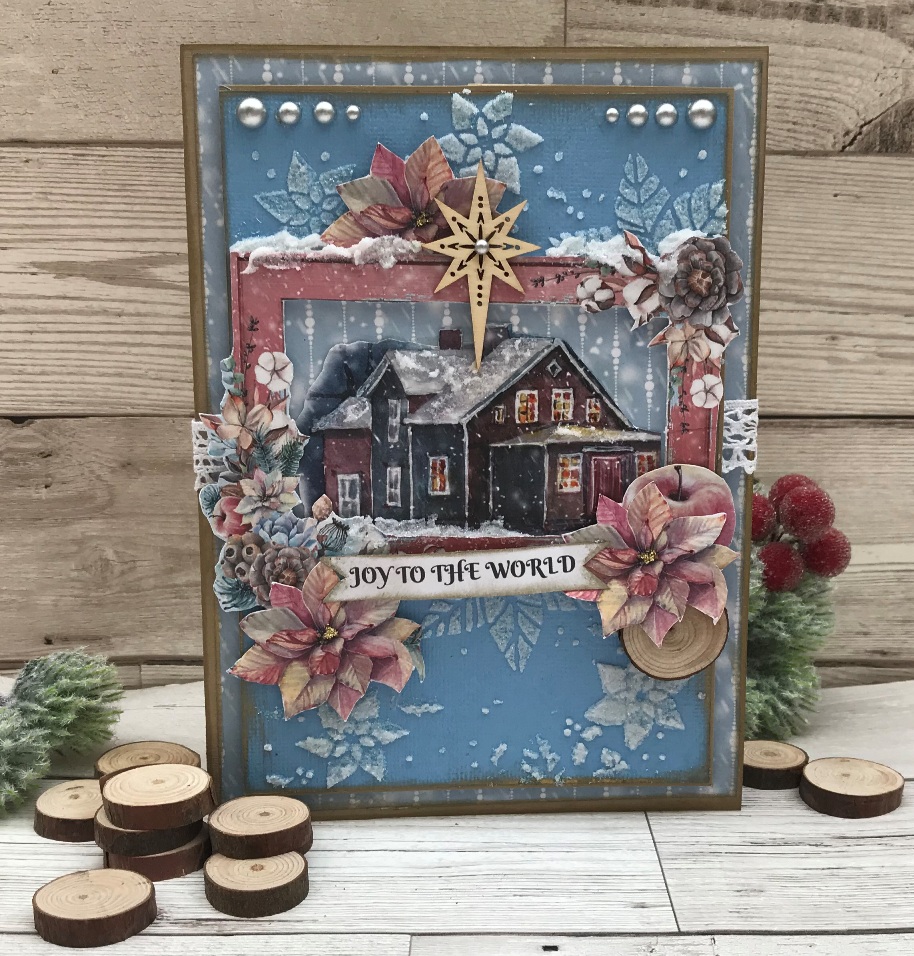

I created it as follows:
  •  Fold a piece of Cappuccino coloured card into size A5
  • Cut a piece of Cotton Winter paper CW3 into a size slightly smaller than the front of the card. Ink edges with metallic gold and adhere to front
  • Cut a piece of plain blue cardstock to mat onto the CW3 piece (see picture). Using Snowflake paste stencil the poinsettia/Snowflake pattern using Kaisercraft "Holly" template. When dry ink edges then mount onto card using foam tape.
  • Cut out the pink frame from Cotton Winter paper CW6. Cut out the inside too. Cut out the building from CW7 and mount onto a piece of CW3, then adhere behind the pink frame. 
  • Stick a piece of white lace to the middle then mount the frame piece onto the front as shown.
  • Fussycut images from various Cotton Winter paper , and adhere as pictured. Elevating some on foam pads.
  • Cut out one of the sentiments on the bottom of the Cotton Winter sheets. Ink edges attach on foam pads
  • Finish by adding snowpaste to the top of the pink frame and on some of the cut-outs
  • Add a Kaisercraft Star from the "Fancy Christmas" flourishes box.
  • Add a Tim Holtz Wood Slice 
  • Add Pearls (I used Graphic 45 Pearls) 


  I created a simple design inside:

The next two cards are A6 size:
 
 
 Card 1:

I created this card as follows:
  • Cut a piece of "Cappuccino" coloured plain cardstock into a card size 5.75" x 4.25". Ink edges with metallic gold. 
  • Cut out a piece of Cotton Winter Paper CW4 slightly smaller than the card front. Ink edges with metallic gold and adhere to the front.
  • Cut a piece of Kaisercraft  "Thyme" plain cardstock into size 3.5 x4.75". Ink edges. Cut a smaller piece of CW4, ink edges and adhere to the top. Cut out the relevant green frame from Cotton Winter paper CW6. Adhere a piece of cream lace ribbon around the frame then adhere to the front as show. 
  • Cut out images from various Cotton Winter papers and adhere as shown. 
  • Add snow paste to the top of the frame and on some of the cut-outs
  • Add a sentiment cut from the bottom border that is on all the Cotton Winter papers, and ink with metallic gold. Adhere to the top using foam pads to elevate the piece from the card.
  • Decorate a piece of Kaisercraft Chipboard flourish from the "Fancy Christmas" pack  with Gold Glamout Dust. Attach below the sentiment.

The second card is very similar:

Here I used Kaisercraft Chipboard flourishes from "Festive Foliage" glittered with Glamour Dust as before. Also Graphic 45 pearls.


To finish creating with Cotton Winter I made three ATC's for our monthly ATC swap - come join the group either on Facebook or on our forum:


You can find this gorgeous collection here in our shop:
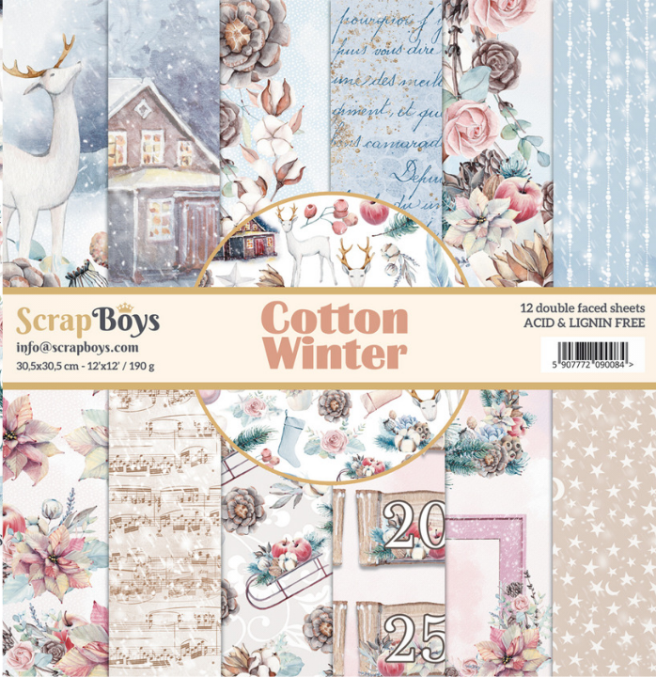
https://www.charmedcardsandcrafts.co.uk/acatalog/Scrap-Boys-Cotton-Winter.html


Merry Christmas Everyone

Monday, 16 December 2019

Stamperia Christmas


Hi All,

Christmas is approaching at a frightening speed; why is it it always takes me by surprise even though I think I have it under control?  If you are behind then I hope you can take inspiration for Christmas cards from these super easy cards.  I used two sheets of 12x12 Stamperia papers that had appropriate designs, these are from the "Make a Wish" collection. I used papers "Christmas Cards SBBL636" for the rectangle images, and "Christmas Rounds SBBL637" for the round images.

Most of the cards are A6 size, with the three largest in A5.

I cut out two mats, one slightly smaller than the card in a beige cardstock, and one slightly smaller  in red. Using the holly design from the Kaisercraft stencil "Holly" I stencilled the design onto the red cardstock using Finnabair "Snowflake Paste" and left to dry. Once dry I inked the red cardstock with metallic gold ink, matted it on the brown cardstock, bound a piece of red velvet ribbon around it, and adhered this piece to the front of the card. 
I cut out all the circles on the paper, inked edges, matted on dark brown cardstock, then brushed some of the rounds with Stamperia Crackle Glaze. Once dry they were mounted onto the front of the card on foam tape. I finished these cards with a sentiment and a little poinsettia. These are the round design cards (you can also find them in the "Make a Wish" pack):

Here you can see the crackle on the "Make a Wish" card.


 I also added a Kaisercraft Flourishes Star from the pack "NORDIC" and added sparkle to the star with Crystal Glamour Dust:


The other cards with the round cut-out images:


Here you can see the lovely crackle effect:


Attach the round circles and sentiment on foam tape to elevate them as shown:


The rectangle cards:


The first card is A5 size:


 The following cards areslightly smaller than A5:


Crackle glaze on baubles:


The paper has a corresponding journalling rectangle on the reverse side, so if you have two of each sheet you can use the second on the inside of the cards:


On the next card I added snow to the roodtops, brads to the tags, a glittery star, a lace strip and a sentiment - sorry my computer increases the brightness each time I try to crop etc, it is infuritating! No idea why it has started doing that. Colours are far more subtle than below:


 So there you have a whole load of cards. These were really fun to make, and to be honest they looked even better in real life :)  Find the Stamperia papers here

Happy crafting friends xXx

Sunday, 20 December 2015

A little Christmas Inspiration

Hands up how many of you are ready for Christmas. You'll notice my arm forlornly by my side.  Christmas wouldn't be Christmas without those last minute panics for us mums! It all works out and every year things are done in time, hope I'm not becoming complacent!

If you still have cards to make here are some super easy makes.


My first card uses an image from one of the Graphic 45 "A Christmas Carol" papers: "Scrooge & Marley". I cut out around the sign, inked with distress ink then used glossy accent on the sign.  
The background paper is from the Kaisercraft "Holy Night" paper pad.
Poinsettia (also with Glossy Accents), acetate corner and Holly is from K&Co. 
The card is finished with a few pearls.


My second card is again using background paper from the Kaisercraft "Holy Night" paper pad. This time a beautiful gold foiled design.  From the same pad I also got the "We wish you a merry christmas" sentiment, which I glossed with Glossy Accents.
Holly and Poinsettia are K&Co. 
I cut out another image from the Graphic 45 "A Christmas Carol" "Scrooge & Marley" paper, this time the open pages of A Christmas Carol. I inked it with distress ink the used glossy accent on the "A".
The little Christmas angel has been inked with red distress ink and then highlighted with metallic gold. I used Glossy Accents on everything  on the image to really bring it to life and dotted the snow with Liquid Pearls.


Inside the card. Sentiment is a Kaisercraft rub-on. A little poinsettia adorn the top of the sentiment, which has been cut with Spellbinders dies. That beautiful gold foiled paper again from the Kaisercraft pad.


My third card uses yet another image from the Graphic 45 "A Christmas Carol""Scrooge & Marley" paper, see how versatile it is?   I cut it out and used Glossy Accent on the flowers. the dots around the edge were emphasised with red Stickles. I took an image from another sheet from the Graphic 45 "A Christmas Carol" collection, called "Figgy Pudding" and cut out the sentiment and the flowers. After inking the edges of the sentiment, it was layered on the first image using foam tape to lift it off the card. I again used Glossy Accents on the flowers.
The two stamps are from the "Scrooge & Marley" paper.

Background paper is another design from  the Kaisercraft "Holy Night" paper pad.
Poinsettia is K&Co. This was again glossed with Glossy Accents
The card is finished with a few pearls


I used yet another sheet of paper from Graphic 45 "A Christmas Carol for an ATC project for our forum. Our monthly ATC swap was themed "Christmas" and I cut out images from the paper "Seasonal Sentiments" for my three cards. If you would like to join our monthly swaps we would love to see you there (sorry but the swaps are UK only).


GRAPHIC 45 CHILDREN'S HOUR

I must just shout about the latest products to land at the Charmed door, namely the fabulous "Children's Story" from Graphic 45. This is a calendar collection at heart but it is so much more. Use for card making, scrapbooking and other paper products. The calendar pages themselves are housed in the paper pads this time, with coordinating designs available in both single sheets and pads. Pop over and take a look.


http://www.charmedcardsandcrafts.co.uk/acatalog/Graphic-45-Childrens-Hour-.html