Showing posts with label Scrapbook Layouts. Show all posts

Saturday, 9 June 2018

Anthology Inspiration from Kaisercraft

Hello lovely crafting friends,

I hope you are enjoying the weekend. It's beena  bit of a mixed bag here in London today, intermittent sunshine with grey skies hinting at a possibility of rain. Hopefully Sunday will prove brighter.

I wanted to show you one of the latest collections from Kaisercraft: Anthology.


https://www.charmedcardsandcrafts.co.uk/acatalog/Kaisercraft-Anthology.html 

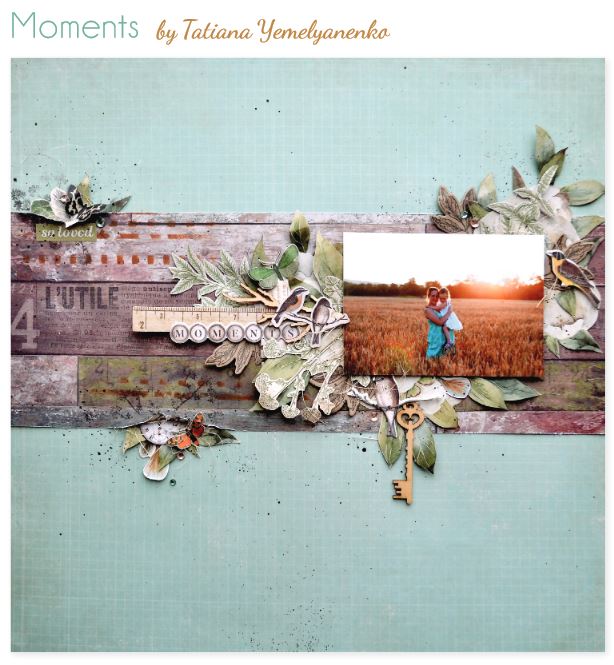
 I really like this release, it's a vintage collection depicting antique florals, with birds, butterflies and other winged creatures, as well as feathers, sentiments, and even an apothecary cabinet - all in deep warm hues. Coordinating with the papers are die-cuts, stickers, stamps and new templates, and we put together  other coordinating products you may like to team it up with. 

As you can see the collection lends itself perfectly to a plethora of projects. Here are project examples, cards and layouts, from the very talented Kaisercraft design team:


Totally inspiring work there from the Kaisercraft team, all using the new Anthology collection.

Happy Crafting friends :)


Friday, 9 December 2016

Naughty or Nice?


Naughty or Nice by Design Team Member Karen Leahy:


Nothing screams traditional to me more than Santa and I loved the photo of my husband trying to sneak a look at Santa’s book listing who was naughty and who was nice. The Bo Bunny Tis TheSeason papers were just perfect for such a traditional Christmas photograph. 

http://www.charmedcardsandcrafts.co.uk/acatalog/Bo-Bunny-Tis-The-Season.html

Instructions:
I started by edging the gorgeous wood grain paper on the back of the Ornaments paper with thin strips cut from the striped back of the nostalgia paper to make a red and green border. Although I carefully mitred the corners to keep them neat I didn’t like the way the stripes met and so I made small corner pieces cut from a square of red cardstock, inked, folded and attacked with small dark green brads. 
 
For the frame I mounted the picture onto bright red cardstock and then added a border of candy cane baker’s twine using double sides tape. The packaging of the paper pack was so gorgeous I just had to use it, so I cut the title block saying Tis the Season out and used it as a tab for the photo frame mount. To echo that circle I cut one of the roundels from the numbered sheet of paper which said ‘Absolutely no peeking’ and just begged to be used on this page. I mounted it on some of the red cardstock and on some of the dark green that was the reverse side of the numbers sheet and finished it with a baker’s twine bow to tie it in with the rest of the frame before adding it to the frame on foam pads. 

I cut lots of strips of the different papers and used them as banners beneath the frame. This is a great way of using up scraps of paper. You know I never throw ANYTHING away!  I then added the frame on the top. 

I added some word strips, a cut out title from white  and red card and finished it with one of the chipboard Santa embellishments. 

http://www.charmedcardsandcrafts.co.uk/acatalog/Bo-Bunny-Tis-The-Season.html

http://www.charmedcardsandcrafts.co.uk/acatalog/Bo-Bunny-Tis-The-Season.html

Sunday, 29 September 2013

SPOTLIGHT ON: The Avenues by Bo Bunny

The Avenues is a timeless collection of vintage elegance; it lends itself to a multitude of projects with its classic charm and warm pastel hues.  We take a look at some of the wonderful projects created by the fabulous Bo Bunny team using this collection.


Layout by Gabrielle Pollacco


 Gabrielle cut out various elements from the 12x12 papers, such as the clock, shutters and doors, and added them to her layout:


Card by Romy Veul
 Romy has a great tip to share: "Don't be afraid to layer embellishments! On the left part of my card I stapled a chipboard medallion onto a chipboard tag and also added a 3D banner sticker on top of it. By layering embellishments, you can turn one embellishment into a real eye-catcher."


Layout by Ilene Tell
 Ilene has a super tip: "If you want to add a texture stamp somewhere on the layout, and have it fade out toward the center, simply add ink to the stamp and then use your finger to tap the edge and smudge the ink - as a result, you will get a "fade-out" effect."


Layout by Kaori Fujimoto


Mini Matchbook Album by Lisa Gregory

A beautiful matchbook labum by Lisa Gregory. Lisa says: This is a match book style mini album made from paper towel rolls. The paper towel rolls are the pockets and I created tags to slip into the pockets"


One of the The Avenues Trinkets makes a beautiful opener on the front:


Layout by Maryia Potapovich


Layout by Agnieszka Bellaidea


Card by Ulrika Wandler


Layout by Rhonda Van Ginkel

Rhonda has pierced a border around the top of the arch for a great accent:


Layout by Denise van Deventer


Layout by Amy Voorthuis

Layout by Kerry Babbitt


Beautiful inspiration there from the Bo Bunny team. If you have made anything using the The Avenues collection we would love to see it. Just link to your project either here or on our Facebook page and we will pop by and take a look.

Have a great day xx

Saturday, 28 September 2013

SPOTLIGHT ON: Zip-a-Dee-Doodle

The new Zip-a-Dee-Doodle line by Bo Bunny is fun and quirky, and quite reminiscent of the fun 60's/70's style with lots of paisley and funky flower power in fun whimsical doodles :) The papers are double-sided, with the reverse generally being in black and white, lending themselves perfectly to fun times with paints, inks and sprays :) 

Along with twelve 12x12 double-sided papers, the line also have a 6x6 pad, chipboard, layered stickers, pearls, flowers, buttons, trinkets, and die-cuts. As always a complete solution for perfectly coordinated projects. 


We are taking a look at some of the wonderful projects created by the Bo Bunny design team using this collection:


Layout by Kris Silvester 


Layout by Juliana Michaels 
 A great tip here from Juliana: I have used a tab sticker and die cut from the Noteworthy pack to add my journalling. It is hidden behind one of my photos.


 You can see from the pictures above and below how Juliana has cut out elements from various papers and added them onto her layout, slightly raising them for a 3-dimensional effect.


On the canvas below Kris Silvester has combined the Zip-a-Dee-Doodle papers with paints, pens and inks to great effect.
Canvas by Kris Silvester


Layout by Rhonda Van Ginkel
In this layout Rhonda combines Zip-a-Dee-Doodle with Bo Bunny's The Avenues collection (which we shall be spotlighting tomorrow), showing just how versatile these collections are:


The ability to mix collections is shown to great effect in the following two layouts:


Layout by Denise van Deventer

On this layout Denise used a Zip-a-Dee-Doodle papers as the main background with elements from The Avenues, Fright Delight, and Silver & Gold.


Denise says: "I added some gesso to my photo and to the edges of my torn pages, to soften them and allow them to merge into one another, and with the background! I am a very stingy scrapper and like to use everything, and nothing goes to waste. So my other tip is to use the in between bits of the chipboards. You will see I used the beautiful Silver and Gold chipboard swirl, as well as the in between bits for embellishments. "


On the following layout Amy Voorthirus has used papers from Fright Delight (Ghouls and Creepy) Zip-a-Dee-Doodle (Meow and Collage) and Autumn Song (Stripe), as well as Zip-a-Dee-Doodle Combo Stickers and Trinkets, Fright Delight Dimensional Stickers, and Elf Magic Brads.

Layout by Amy Voorthirus


On the next layout you can see how adding your own colour to the black & white papers allow you to get just the look you want:


Layout by Juliana Michaels


 Cut out elements from the paper and layer them around the photo for a great 3-dimensional effect.


Card by Ulrika Wandler


Layout by Ulrika Wandler

After cutting out elements from the paper Ulrika has left some unstuck to lift it off the page:


Layout by Ulrika Wandler


We love how Ulrika has added her own doodled border as a second frame behind the picture:


Layout by Ilene Tell


Amazing work there from the Bo Bunny team. Please leave a comment with a link to your project if you have been using the Zip-a-Dee-Doodle collection. We would love to come and see your work.

Have a great day xx